PROCESSING
Speed up your workflow
Save time by automating common processing steps like boosting contrast and reducing noise

The world of astrophotography can be daunting, and learning image processing can be a particularly steep learning curve. Any help that can boost our editing skills is a bonus. In Adobe Photoshop, ‘actions’ can help to overhaul your processing workflows. These are a set of steps that can be saved and replayed on future images to, for example, boost contrast or reduce noise. You can also purchase actions created by someone else.
One such set is Annie’s Astro Actions, a comprehensive set of 24 different workflows that can guide you through the editing process, from simple step-by-step guides, and combining mono images into RGB or the Hubble Palette, to stretching and star removal. A full list of actions is available to view at www.eprisephoto. com/astro-actions prior to purchase.
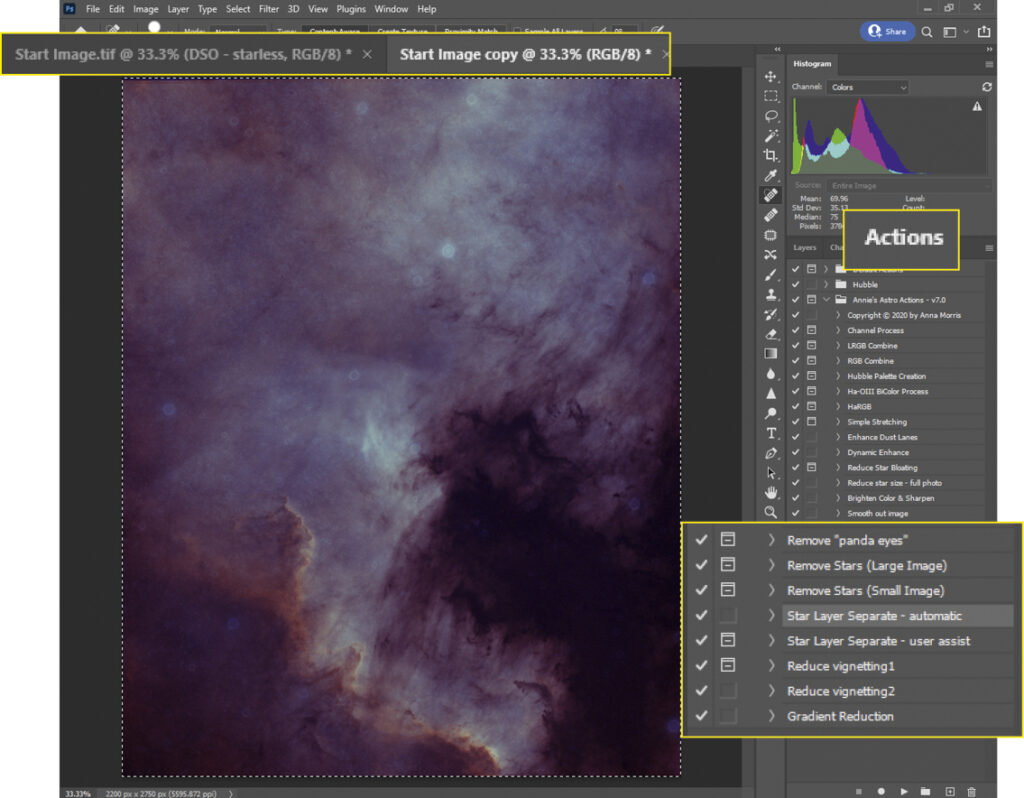
Once purchased, download Annie’s Astro Actions to your PC and save it to a location of your choice. Open Photoshop and ensure your ‘Actions’ tab appears (see screenshot 1). If it doesn’t, click on the Windows menu and tick ‘Actions’ from the list. Under the actions panel, click on the three horizontal lines at the top right and select ‘Load actions’ from the menu to open a file explorer window. Navigating to where you saved your actions file, select it and click ‘Load’. You will see all the actions appear as a list within the actions panel.
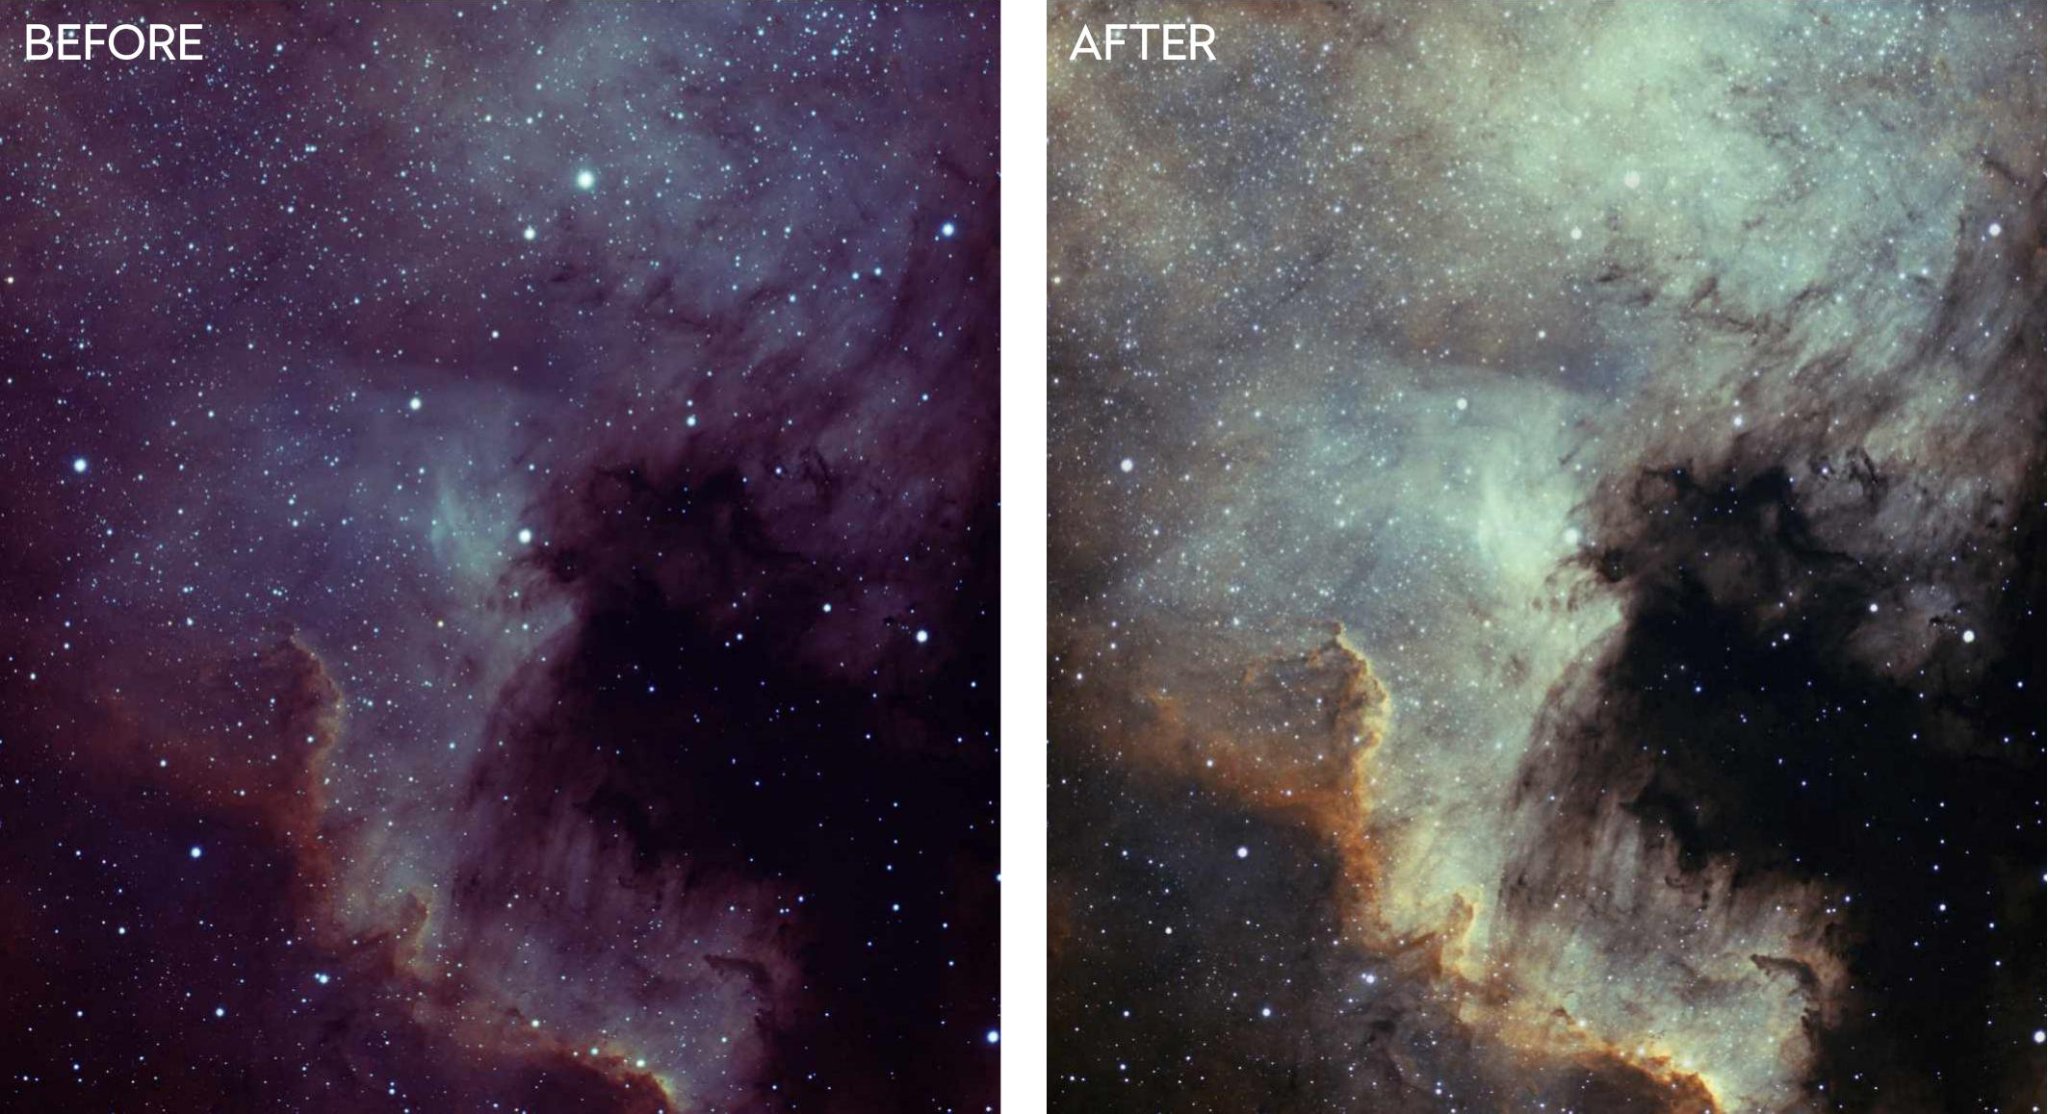
We will show how we used Annie’s Astro Actions to process our image of the North America Nebula, NGC 7000. The first action we applied was ‘Star layer separate – automatic’. This removed the stars from our image and created a duplicate image that contained just the stars. To apply the action, we selected ‘Star layer separate – automatic’ from the list and then hit the play icon at the bottom.
With the nebula and stars separated into two images, we could work on NGC 7000 without bloating the stars. The separation process left some marks around where the largest stars were, so we used the spot healing brush to remove them.

Ready for action
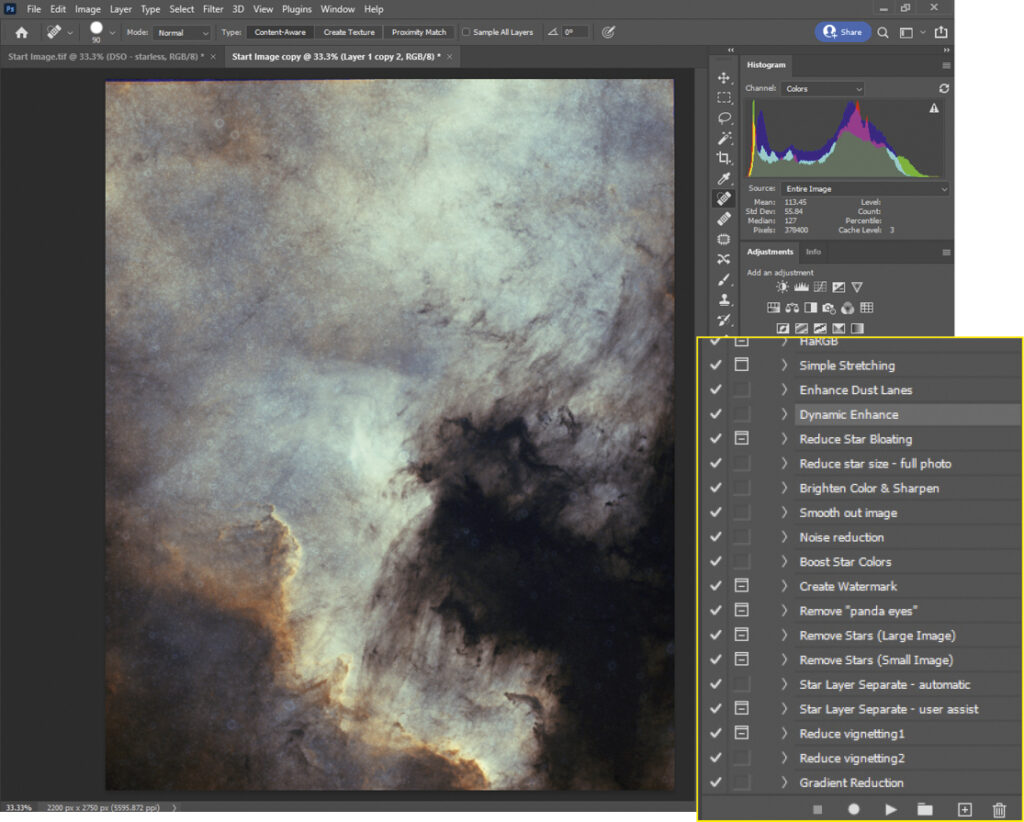
All of Annie’s actions are run by selecting the action from the list and then hitting the play icon. First we used ‘Dynamic enhance’ which brightened the nebula and added contrast. We then applied ‘Brighten colour & sharpen’ which further enhanced the nebulosity.
‘Enhance dust lanes’ brought out the finer details and sharpened the dusty areas. Sharpening the image added noise, so we then chose ‘Noise reduction’ to reduce this, followed by ‘Smooth out image’ which softened our nebula. The final action was ‘Simple stretching’. This action showed us, via helpful on-screen instructions, how to stretch our data and balance the colours using levels and curves. Screenshot 2 shows the effect of these actions.

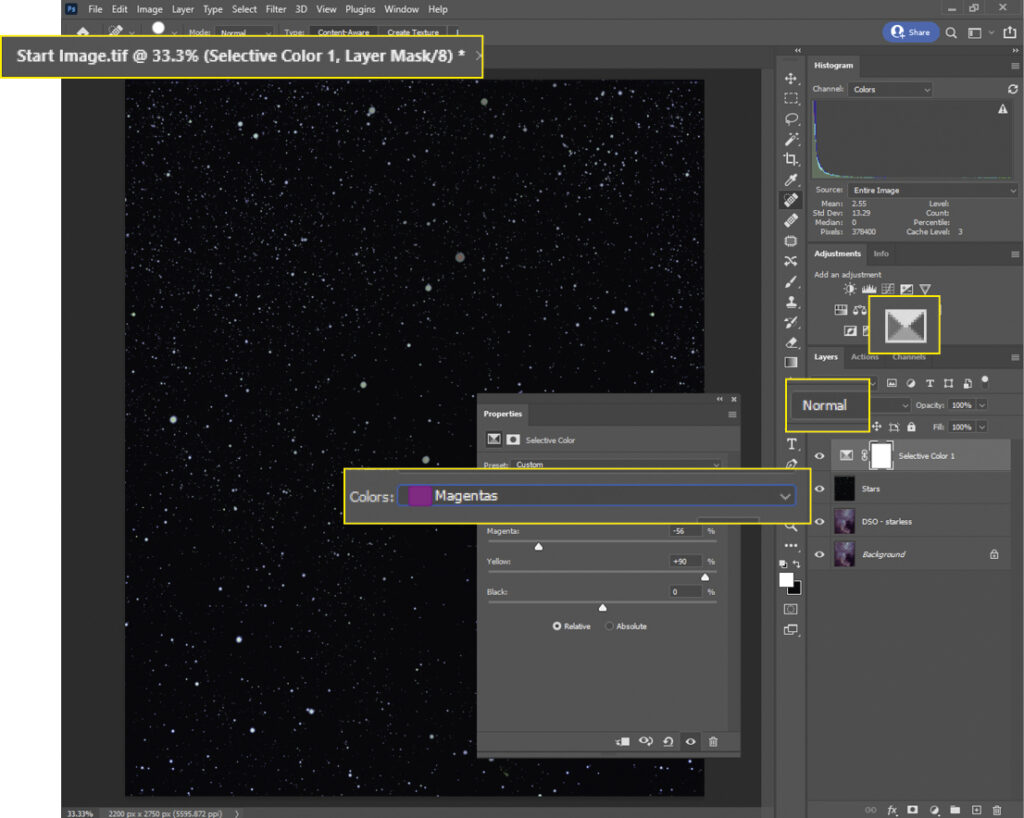
With our nebula image now looking good, we clicked over to our stars image tab (highlighted, screenshot 1). As this image was separated before we applied colour correction, the star colours needed adjusting. We used ‘Selective colour’ to edit each colour channel separately (see screenshot 3). Adjusting the sliders under the cyan, magenta and yellow channels allowed us to create a more natural star colour. This needed to be done by eye.
You may have to apply and then edit each colour multiple times until you are happy with the appearance of your stars.

Once both of our images were processed, we needed to recombine them. Starting on the image of our stars, we flattened the image (Layer > ‘Flatten image’), then clicked Edit > ‘Select all’ to highlight the entire image. With Ctrl + Cwe copied our image. We opened our nebula image from the top tab and pressed Ctrl + V to paste our stars. This created a new layer with our stars. We switched our blending mode from ‘Normal’ to ‘Screen’ and a combined image appeared.
Our final image now contained the processed nebula and star images and, as a final task, we applied the noise reduction action one final time before saving. You can see the final result above.
3 QUICK TIPS
1. You can apply actions more than once.
2. Create a new layer before applying actions (hold Shift + Ctrl + Alt, then press ‘N’ and then ‘E’).
3. Apply the ‘Star layer separate’ action before applying the ‘Simple stretching’ action, to stop stars from bloating.

Chris Grimmer is an experienced astrophotographer and photographer specialising in infrared images