EXPERT WORKSHOP ADVICE
TECH Q&A
MAKE-A-SQUISH FOUNDATION
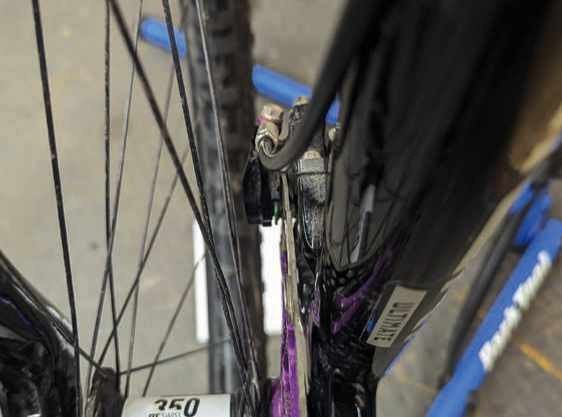
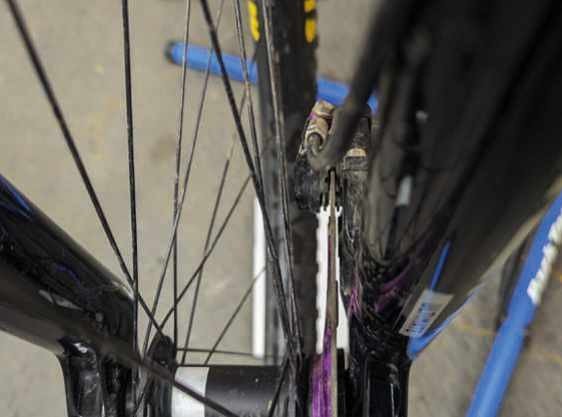
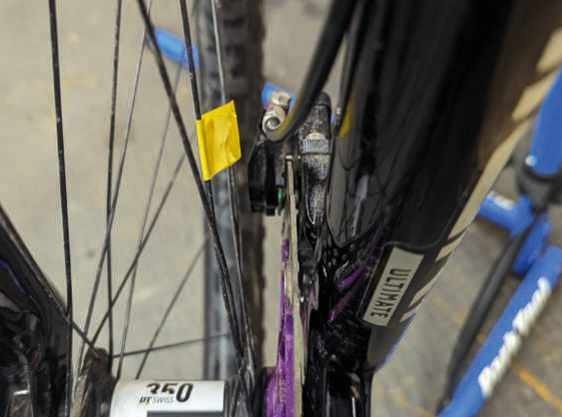
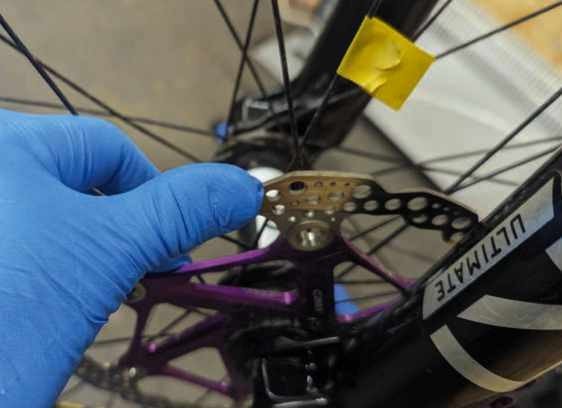
I’ve noticed a ‘squelching’ noise when my RockShox Super Deluxe Select shock compresses. Rear suspension is new to me – should I be at all concerned?
Sam Whittle, via email
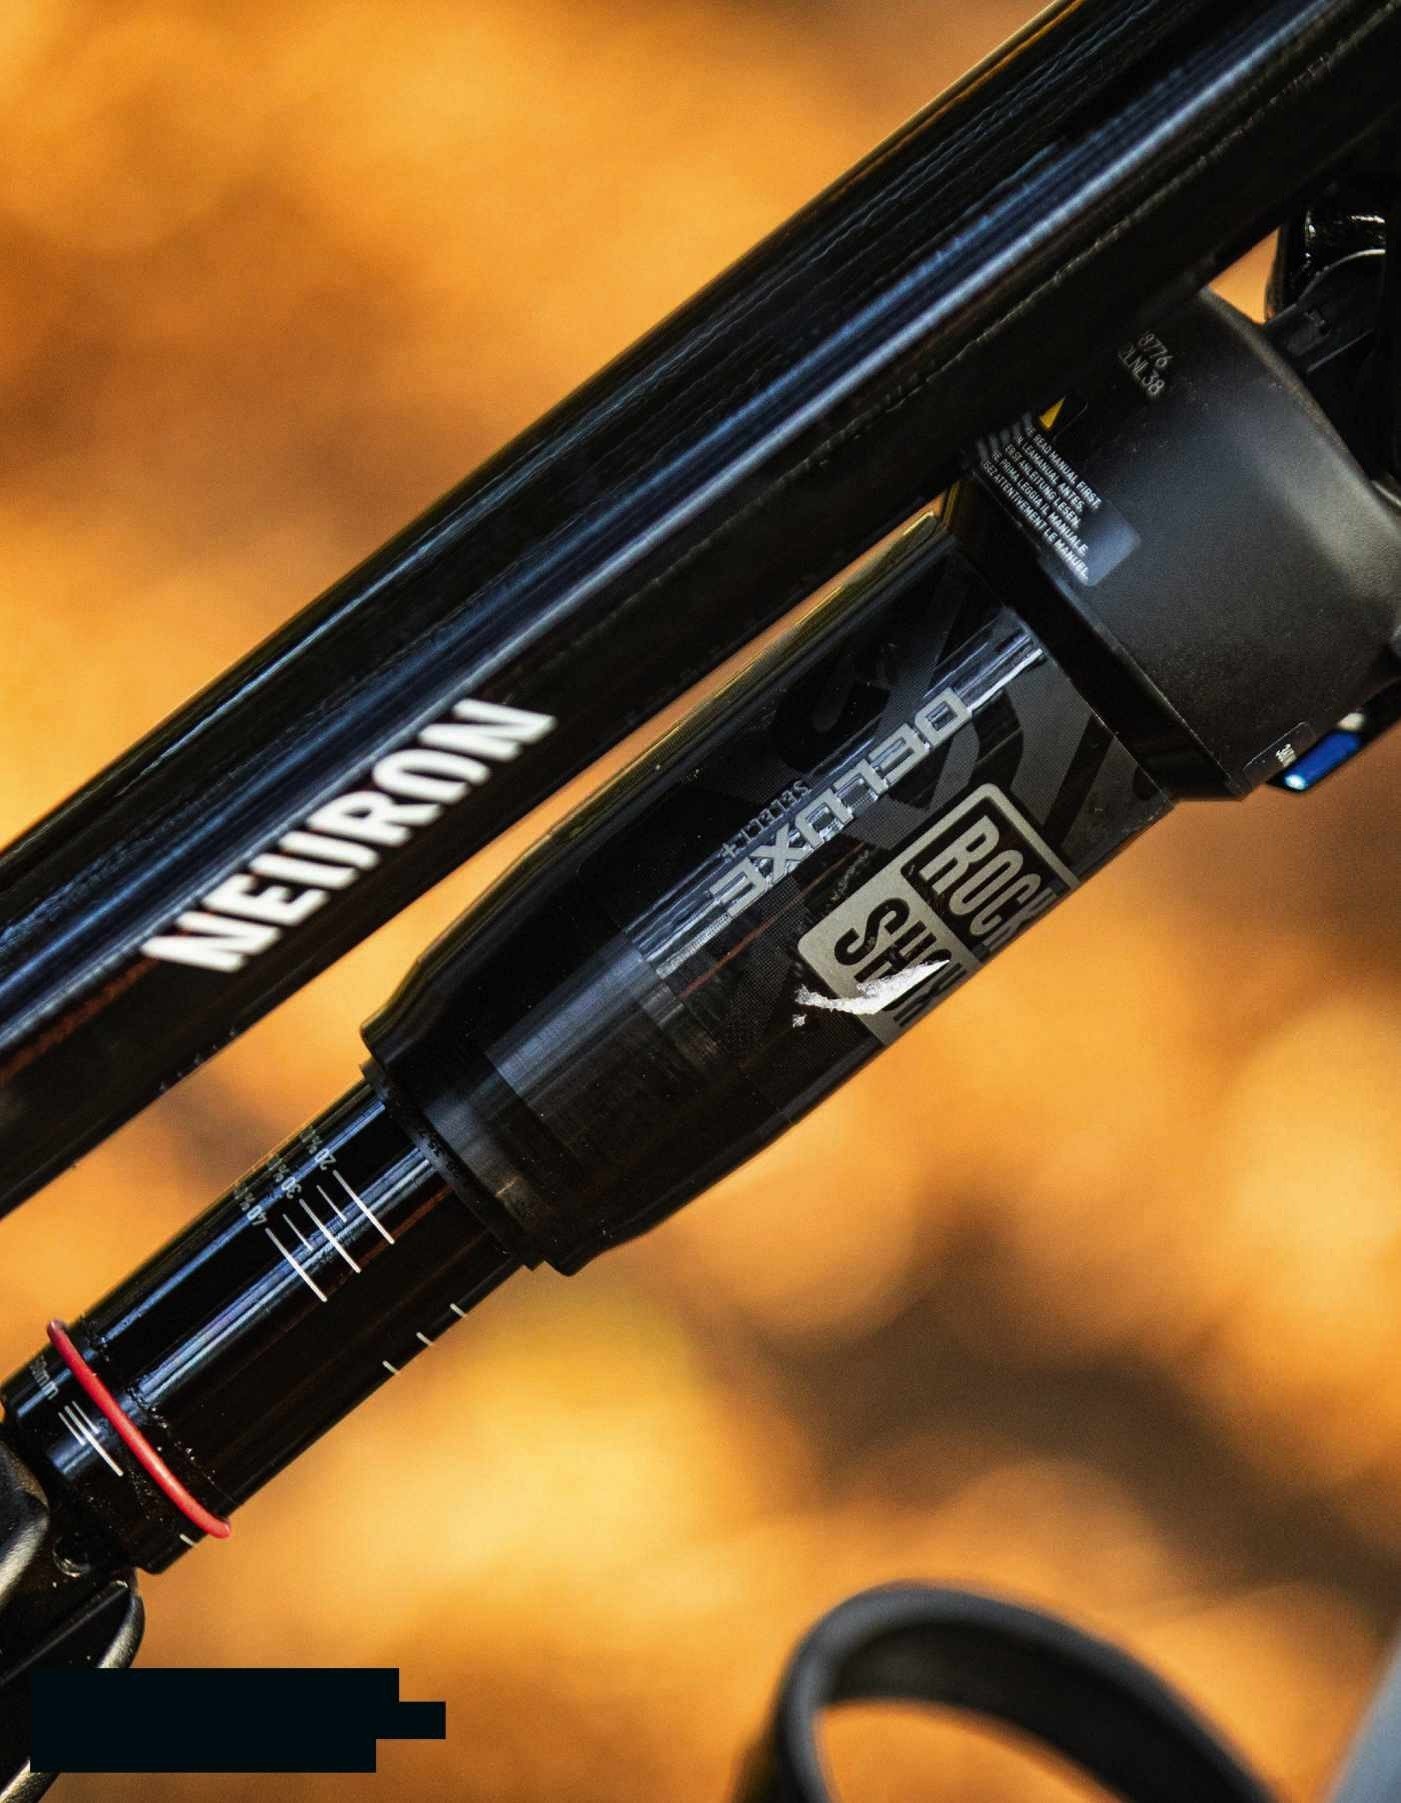
It sounds like there’s cavitation inside the damping circuit of your shock. This means that air bubbles have formed inside the damping oil. As your shock compresses and the shaft hits the bubbles, you’ll hear this unusual sound. This has likely happened due to deterioration of the seals. It’s a common issue and is a sign that your shock needs some TLC.
RockShox recommend that you service your suspension after 200 hours of riding, which sounds like a lot, but clocks up quicker than you’d think. Seals will also deteriorate over time, whether the bike is being used or not. The best thing to do is to get a service booked in, so a professional suspension mechanic can crack it open and see what’s going on inside. We recommend you get it looked at as soon as possible, before more serious damage occurs, which could make things more expensive.
A service should cost about £120. You’ll need to remove the shock from your bike and send it off to a suspension specialist. If you’re not happy doing this, pop down to your local bike shop and they can take care of it for you.
PROTECT THE PEEPERS
Having ridden uplifted downhill trails for years with a full-face helmet and goggles, I recently bought an e-bike and switched to an open-face. I still want eye protection, but without the look of a trail lid and goggles. Can you recommend any good riding glasses?
Duncan Aldridge, North Wales
We also lean towards using goggles with full-face helmets and glasses with trail lids, not least because of their better ventilation. Thankfully, there’s now a wide selection of riding glasses available, spanning various price points. Key considerations when purchasing a new pair are that the frame needs to stay securely in place and the lens(es) must be distortion-free, provide a decent field of vision and not fog up too easily. Finding the perfect pair may require some trial and error, to ensure they fit well with your face shape and helmet, and give an unobstructed view of the trail.
In our most recent test (MBUK 425), Madison’s Crypto glasses came out on top, with great performance for their £59.99 price (including three lenses!). At the upper end of the market, SunGod’s Vulcans are a team favourite, offering excellent coverage, full/halfframe convertibility and lots of customisation options, plus a lifetime guarantee. Prices start from £140, with replacement lenses available for £50.
FIN OR LOSE?
Do I have to stick with brake pads that have fins, or can I opt for ones without?
Will Franklin, via email
Just because your brakes came fitted with finned pads, that doesn’t mean you have to buy finned replacements – although there are advantages to doing so.
The purpose of these fins is to create a cooling effect. When you apply the brakes, the friction between the pad and the rotor generates heat and gradually wears down the braking material on the pad. The fins help to dissipate this heat, extending the pad’s lifespan and making the brake less likely to lose power. They can reduce noise, too.
Larger folk or those who brake a lot may notice some benefits from the fins on extended downhills. However, in our experience, most riders in the UK – where descents are typically relatively short – are unlikely to find the difference in performance all that significant.
When replacing pads, the main thing to check is that the new ones are compatible with your brake callipers. A good starting point is to check the manufacturer’s website. Many online outlets also provide information about which brakes their pads are compatible with. If you’re still unsure, you can always nip down to your local bike shop for a chat.
WALKTHROUGH
GET YOUR DISC BRAKES RUNNING SMOOTHLY
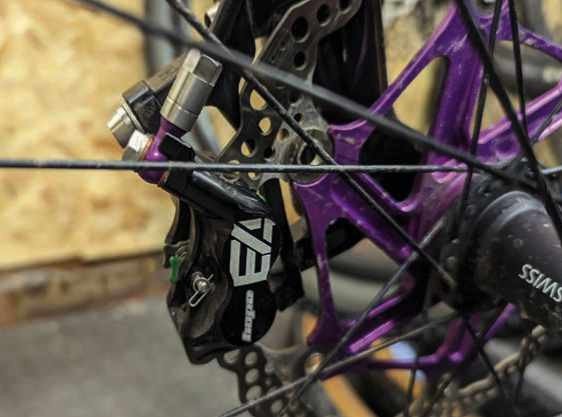
1 Disc brakes work best when the calliper is centred over the rotor and the pistons push evenly, applying equal pressure through both pads. If the rotor is bent (even slightly), the pads are misaligned or the pistons are sticky and don’t move easily, then the efficacy of the brake reduces.
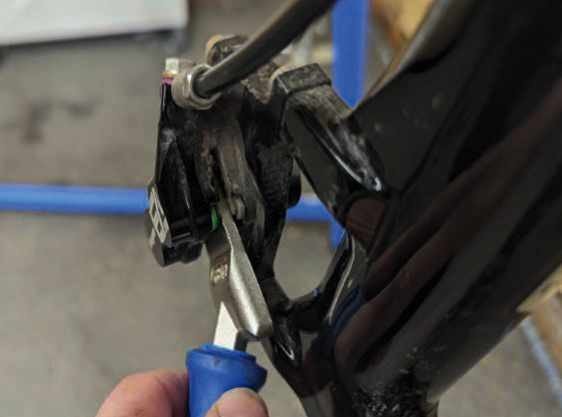
2 Start by fitting new pads. First, use a wide, flat, piston press or flat-headed screwdriver to push back the old pads, so that the brake pistons reset into their bores within the calliper. This will ensure there’s sufficient room for the new pads, which will be thicker than the old, worn-down ones.
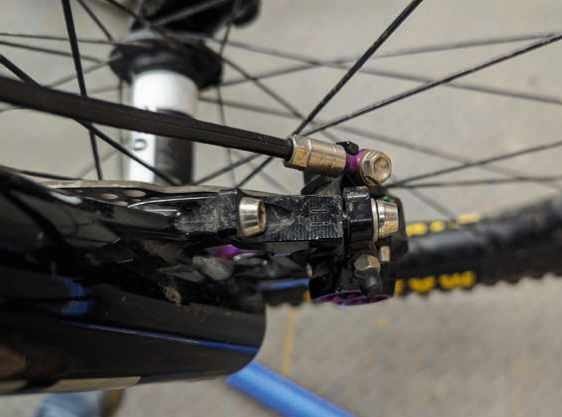
3 Install the new pads. Leave the calliper attached to the frame/fork, but loosen it so it can jiggle about. With the wheel able to run freely, spin it and then pull firmly on the brake lever. Hold the lever tightly while you nip up the calliper bolts.
4 Release the brake lever and gently spin the wheel. Listen carefully for any rubbing of the rotor on the pads. In most cases, this will complete your brake set-up. But sometimes, slight wobbles in the rotor will mean you have to set up the brake by hand.
5 Place a sheet of white paper on the floor and look down through the calliper so you can see the gap(s) between the rotor and the pad(s). With the wheel able to spin freely, slowly turn it and watch the rotor to see if/when it moves from side to side.
6 Spot the areas where the rotor begins to rub on the pad(s). Use electrical tape to mark the spoke nearest the side/point where this happens. Continue until you’ve completed a complete revolution of the rotor.
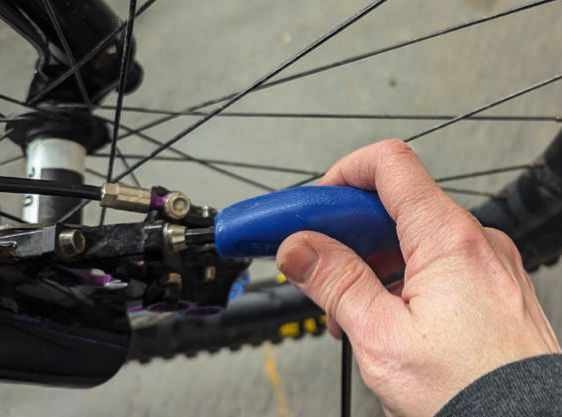
7 At the point that’s rubbing, check the space on either side of the rotor, so that you have a sense of how far and in which direction you’re going to move the calliper. Loosen one bolt and move the calliper over, hold the calliper in place and retighten it. Repeat with the other calliper bolt.
8 Only try bending a rotor as a last resort, because it’s easy to end up over-correcting. Place your thumbs on either side of the area you want to bend and apply gentle pressure. Spin the wheel and check for further rubbing.
BLUFFER’S GUIDE
TRANSPORTING YOUR BIKE IN A VEHICLE
Get your pride and joy to the trails unscathed, whether by car, van or pickup truck
The dream is to roll out of your house and onto the trails. However, most of us have to drive to get to the best riding, so need to transport our bike(s) safely and securely. Here are some of the best ways to do that.
Inside
Putting your bike inside the car/van reduces fuel consumption and protects it from theft and damage, but cuts down on luggage and passenger space, and isn’t always easy in smaller cars or with heavier bikes. It’s important to prevent the bikes from shifting in transit. You can get all sorts of accessories to fix them in place, but bungee cords or ratchet straps often work perfectly well. Put padding between bikes, and remove pedals if space is limited. You may need to remove one or both wheels. If so, put spacers in the brake callipers, ensure the wheels are secure and keep the axles somewhere safe. Fitting a boot liner will help keep the vehicle interior free of dirt and scratches.
On the roof
Roof-mounted carriers offer various ways to secure bikes in place. The two most common are a pivoting arm that clamps around the down tube or a front bar that attaches to the fork dropouts (with front wheel removed), both lockable. Roof-mounting gives you more space inside the vehicle but significantly increases fuel consumption. You also need to be cautious when navigating low-hanging trees or car park height barriers. Additionally, there’s an increased risk of injury, from the strain of lifting bikes above your head. Plus, many roof carriers aren’t rated to carry bikes over 20kg – counting out most e-bikes – and your vehicle’s roof weight limit may preclude you from carrying multiple bikes.
On the back
Rear racks with straps that loop over the top of the boot and arms to hold the bike’s top tube are a relatively cheap option, but vary in terms of stability and security. They won’t affect your fuel consumption as much as roof carriers, but will still cause some drag. Bikes are also in the firing line if you get rear-ended or have a mishap while reversing. Again, padding is key, especially if carrying more than one bike.
On a towbar
Towbar-mounted racks are more stable than boot-mounted carriers and sit lower down, making them ideal for heavy e-bikes. Modern ones also allow you to open the boot with the rack fitted, plus lock the bikes in place. Again, drag is lower than with a roof carrier. Ensure your vehicle’s exhaust isn’t firing directly onto your bike’s wheels.
In a pickup
Bikes slung over the tailgate of a pickup truck are a clear sign that you’re a badass MTBer. It’s an easy way to transport them, and causes little drag. Make sure to fit a tailgate pad, to protect the vehicle and prevent bike movement. If driving through built-up areas, lock bikes together and/or to the truck so no one can lift them out while you’re stopped at traffic lights.